by jackie | Nov 24, 2024 | Books, Cheese, DIY, Food, Holiday DIY, Holidays, Homemade Liquor
Recently, a chat with a friend about holiday spreads set me off pondering a thing I have casually noticed, but never really pondered. My friend used the phrase “I’m known for”.
I have no idea what I am “known for” with regard to specific dishes though you all may feel differently. I honestly have never planned a menu with my signature in mind, and it reminded me sharply of my own family holiday traditions.
I recognized early that there were things “owned” by my mom or her sisters, and those were items that I unconsciously but deliberately did not include on my own holiday table. And honestly, now that my Mom and her sisters are gone, there are massive tradition gaps that are a bit confusing. Is it more respectful to try to recreate? Or is it better to simply feel the absence of the dish and reminisce the contributions and gifts of the missed person? Still working my way through that one, what do you think?
I also noticed that my Mom was not one to avoid someone else’s signature thing, and her cookie tray, while specific and recognizable as hers, included some items that were really signature to one or the other of her sisters.
For my own table, I am guided by my interests, my ethics, and things I want to try. Ingredients I have learned about and am exploring, places I have visited and been inspired by, and generally I am more about process than final product. Things that excited me, that I want to share. I am also motivated to make the spread non-performative, and one that allows me to be a guest at my own party as much as possible.

Densely packed dates, walnuts, apricots, and cherries barely held together with buckwheat flour and very little sugar.
A thing I am very interested in is the more European mindset about pastries and baked goods. Removed from the insanity of mental guilt, cravings, poor nutrition and addictive behaviors inspired by American marketing and advertising, desserts here have become so emotionally complicated. But guess what? They are food. Nutritious food when made with nutritious ingredients.
By swapping whole, ancient, and non-wheat flours & nuts for our nutritionally stripped commodity ingredients, desserts can be returned to their rightful, satiating, and sane place in our everyday diet. And that is precisely the focus of Alice Medrich’s beautiful book, “Flavor Flours”.
I started with buckwheat, because we have a local mill selling their own flour at our local feed store and meat market and it easily presented itself. I did not know yet that buckwheat was not a true grain, but is in fact related to sorrel and rhubarb. Yet, the seeds can be cooked like a grain, and made into flour, and are considered a pseudo-grain. It can have a robust, earthy flavor, and the treatment of the flour matters more than we are used to, yielding varying textures.
To my surprise, both buckwheat recipes I tried from the book ended up disappointing with their blandness. Perhaps my expectations were set too high by lovely descriptives like flowery, rose, and honey and praise for the magical quality added by the buckwheat flour. Which was not untrue, but still not as magical as I expected.
Not ready to give up just yet. I recalled a thing that maybe I was once known for on my holiday baking trays. I used to make these fancy little miniature almond-orange cakes that were finished off with a glaze that was memorable. That glaze made the cakes age so well, and took on a bit of a crystalline quality that I just loved.

And that glaze idea was exactly the thing that makes this date nut cake with cherries and buckwheat a signature thing. But I’m gonna tell you right off, this cake is poorly named. I would not use the word cake, or bread to describe it. It is dense, packed with fruit and nuts, and very little sugar. The batter is just enough to bind the fruit & nut mix into a sliceable loaf. A little goes a long way, carved super thin, the slices look beautiful on a charcuterie board, and pair well with butter, cream cheese, and stronger cheeses – I found the stilton in huntsman to be extra nice.
For the finishing glaze, most liquors you have on hand should be fine excepting things like gin. Brandy always works, Contreau, whiskey, schnapps… I happened to have been gifted a bottle of cherry liquor brought by a friend from Lisbon, and that extra fruitiness was subtle perfection. Homebrew liquor could be very nice.
About the book, “Flavor Flours.” It. Is. LOVELY. GORGEOUS. EQUISITE even.

The Carnegie Library has three available copies, and Alice Medrich has also expanded this topic into another separate book, Flavor Flours Gluten Free. But, this is not the book I would recommend if you are just beginning a journey away from processed foods and looking for practical knowledge to apply to your everyday meals. This is all about digging deeper into non-commodity baked goods.
- 1/2 + 2TBS cup buckwheat flour 70 grams
- 1/8 tsp baking soda
- 1/8 tsp baking powder
- 1/4 tsp salt I use Morton's kosher
- 3 Tbs firmly packed brown sugar 35 grams
- 1 cup dates pitted and cut into quarters 175 grams
- 1/4 cup lightly packed dried apricot halves or dried pluots cut in half 40 grams
- 1/4 cup dried tart or Bing cherries 40 grams
- 1-3/4 cup walnut pieces 175 grams
- 2 eggs large
- 1-1/4 tsp pure vanilla extract
- 3 TBS liquor Brandy, whiskey, schnapps, etc
- 2 tsp water
- 1/3 cup granulated sugar
- 1 TBS butter calls for unsalted, but salted is fine
8x4 (four cup) loaf pan
parchament paper
Line an 8 x 4-inch loaf pan, bottom and all four sides wth parchament paper
Position a rack in the lower third of the oven and preheat to 300°F
In a large bowl, whisk the flour with the baking soda, baking powder, and salt. Add brown sugar, dates, apricots, cherries and walnuts, and mix thoroughly with your fingers, separating any sticky fruit pieces. Set aside
Whisk the eggs ad vanilla in a medium bowl until lightened in color. Scrape the misture into the fruit & nut mixtureand mix gently with a spatula until all the pieces are coated with batter. Scrape into the prepared pan
To make the glaze, in a small saucepan over medium-low heat, combine the Grand Marnier, water, granulated sugar and butter and heat until the butter melts, about 1 1⁄2 minutes. Bring to a boil and cook, stirring occasionally, for 30 seconds. Remove from the heat and let cool for 1 minute.
Bake for 60 - 80 minutes, until the top feels firm and crusted. Brush the warm cakes with the glaze; allow to cool in the pan on a rack. Let cool completely before serving.
Using the parchament paper, lift the loaf from the pan and transfer to a cutting board. Use a sharp knife to cut very thin slices. This cake can be stored, airtight for at least 1 week at room temperature, longer in the refrigerator. I wrap in waxed paper. Makes an excellent gift.

by jackie | Sep 29, 2024 | Care of the Soul, Dessert, DIY, Eating Local, Food, Foraging, Gratitude, Lard, Local Farmers, Pie, Uncategorized
Hand pie, fry pie, stack pie, fruit pie, cream pie, depression pie…. is there anything more humble yet sublime than homemade pie?
There is nothing that better represents how, with a little ingenuity and elbow grease, pleasure and love can come from the kitchen even when times are tough. Today, as we near October, Pennsylvania is thick into apple season, and my wild trees have been giving up their fruit. This year was a particularly good one for all the fruits here, for which we are all grateful.
I used to get all cheffy and elaborate when making pies and preserves, but now that I have come to savor the difference between supermarket produce and the things I seek out from local farms and forests, I want to keep the focus on the particulars of the fruit, and keep the seasonings simple.
My wild apples are unlike those from the orchard, being a little different in texture and very intense in flavor. They are also as wild as can be, so have odd skin color and blemishes, which do not bother me at all. For baking, I like a mix of varieties – which always makes a pie more interesting. I like a crisp and tart variety mixed with a good Golden delicious or two. Delicious apples have gotten a bad rap after years of being the apple favorite of elementary schools, hospitals, and convenience stores, which is entirely unfair. A good Delicious apple has a juicy-sweet spiciness, and a texture that bakes up soft and tender. I was pretty delighted to discover a wild tree that has knobby, small, very seedy fruit with a Golden Delicious flavor, though they are kind of a pain to peel and woud take a ton to make a full pie.
I do pack my pie with lots of fruit and little else, and stick to crusts made from fats like butter, lard, or a combo. This is a very basic recipe, adapted from my Mom’s McCall’s Cook Book, in which I have discovered a surprising number of new-old ideas. It can be easily adapted to pretty much any fruit, adapting a little for straining the excess liquid when using juicier fruits – I find 1/2 cup of liquid is the perfect amount to form a softly gelled, not runny fruit filling.
Bonus: If you strain off excess fruit liquid, remember to make some fruit shrub using your remaining vinegar water from the pie crust.
So, here’s your next weekend plan – Hit your farmer’s market for apples & snacks, go home & bake yourself a pie, go for a tramp in the woods, come home, enjoy pie. Best of all, Sunday morning pie for breakfast is the best…
- 1 recipe Pastry for 2-crust pie I've included my recipe in this post, but If making dough keeps you from this simple pleasure, use store bought pre-rolled crust
- 3/4 cup granulated sugar
- 1/2 teaspoon cinnamon
- 1/4 teaspoon ground clove
- 8 cups peeled and thinly sliced apples 10 - 12 medium apples
- 3 Tablespoons all purpose flour
- dash kosher salt
- 2 Tablespoons Butter
In a small bowl, combine sugar, cinnamon, clove, flour, and salt, mixing well.
Preheat oven to 375°F, arrange rack in the center of oven.
On a lightly floured surface, roll one of your pastry disks into an 11-inch circle. Line your pie pan and set aside.
Add your sugar mixture to your sliced apples in a large bowl, tossing lightly to combine well
Turn the apples and spice into the prepared pie crust, mounding highest in center. with a knife, cut small chunks of butter and dot evenly atop the apples
Roll out the remaining pastry disk into an 11-inch circle. Gently place on top of pie, trimming excess using a sharp knife so the top crust is very slightly larger than the ecge.
Gently roll top crust under the bottom crust, sealing the filling inside, and pressing gently with your fingertips. Crimp the edge to give a finished edge, either with your fingers or a fork. Gently slice slits in your top crust to allow steam to escape
Place the pie pan on a baking sheet to catch any leaking juices, and slide into preheated oven. Bake 45 - 50 minutes, until crust is golden but not too brown.
Remove to wire rack and allow to cool fully before cutting. Warm pie is delicious, but the juices will not have set and your pie will not slice well. Still good!
Serve with a thin slice of cheddar cheese, custard stirring cream, or ice cream.

- 2-1/2 cups unbleached all purpose flour
- 1 tsp kosher salt
- 1 TBS granulated sugar
- 1 stick cold unsalted butter (salted is fine too) cut into 1/2-inch pieces (1 stick equals 1/4 pound)
- 1/2 cup rendered leaf lard, very cold/frozen cut into 1/2-inch pieces
- 1/2 cup very cold water
- 2 TBS cider vinegar
- 1/2 cup ice
Stir the flour, salt, and sugar together in a large bowl. Add the butter and lard piecesand coat with the four mixture. Using a pastry blender, cut the butter into the flour mixture, working quickly until mostly pea-sized pieces of butter/lard remain. Be careful to not overland.
Combine the water, cider vinegar, and ice in a measuring cup. Sprinkle 2 TBS of the ice water misture over the flour mixture, then mix and cut it in with a bench scraper (or your hands). Add as needed additional water - this understanding is something you will gain with practice. Go slowly, sprinkling 1/4 - 1/2 tsp at a time, undil the ball of dough has enough moisture to come together into a ball, with some dry bits remaining.
Squeeze and pinch with your fingertips to bring all the dough together, adding small drops of the water mixture if necessary.
Cut the ball in half, shape into two flat disks, wrapping separately in plastic wrap. Refrigerate at least 1 hour, preferably overnight, to give the gluten strands in the flour time to relax, and make the crust roll out more easily.
Wrapped well, your dough can be refrigerated for 3 days, or frozen for 1 month.
If you need some guidance about rolling your dough, this is a very comprehensive video and photo series. Pie is a skill, but it is not rocket science and I have every confidence with a little persistence, pie will become a valuable tool in your weekly menu rotation for pies both celebratory and everyday, sweet and savory.
I make crust as one of my regular morning cooking projects, tucking crust into the freezer for a future day. Making pie is no big deal at all when you break down into two sessions the making of the crust and the making of the pie.
The fat quantities remaing the same for an all butter crust pie - simply use two sticks of butter in place of the butter & lard.

My wild, organic-as-can-be apples, ready for pie

by jackie | Sep 14, 2024 | Beef, Books, Bulls, Buying Beef Better, Cheese, Eating Local, Food, GRASSFED, Gratitude, Heritage Breed, Local Farmers, Meat, Recipes, Summer, Things We Love
Entertaining or Potlucking? Need a late summer dish for a lazy summer afternoon?
Just got the first Auburn Meadow Farm beef back from the processor, and wowza, did I miss it. Rich, beefy, juicy, and so delicious, when a friend gifted me some beautiful jalapenos and home grown garlic, I knew I had to make armadillo eggs. Armadillo Eggs are a Texas variant of jalapeno poppers, and are usually pretty seasoned up with chiles, seasoned sausages, and bacon. But this beef doesn’t need all that help, and the flavor of the cheese, the jalapeno, the lime, garlic and cilantro is to me perfect for a warm late summer day, especially when served alongside the cool buttermilk dressing and splashes of fresh lime.
As with all things Texas, my go-to inspiration is Lisa Fain of Homesick Texan books, blog, and now Substack. Her recipes are solid, I love her stories, and humble appreciation for the vast history of Texas life and food. Check her out, odds are your public library has a copy of one of her books too. Brief and to-the-point, let’s get straight to it…

Assembling Armadillo eggs
- 4 oz cream cheese
- 1/4 cup shredded yellow cheddar cheese
- 1 clove garlic minced
- 1 tsp cilantro chopped
- 1/8 tsp ground cumin
- 6 medium fresh jalapeños
- 4 pounds ground beef You can also use a combo of ground beef and pork sausage, chorizo would be nice
- 1 fresh lime You can use bottled if you don't have it, but fresh is appreciated
Preheat the oven to 375°F and line a rimmed baking sheet with foil.
Mix together the cream cheese, cheddar cheese, garlic, cilantro, and cumin until well blended. Taste, add salt and adjust seasonings if needed.
Remove the stems from teh jalapeños and cut in half lengthwise. Scoop out the seeds and then cut the sliced jalapeños in half, horizontally. Note to self: wear gloves and do not touch your face or you may be sorry!
Place about a teaspoon of the cream cheese filling in each jalapeño quarter. Take about 1/3 cup of the sausage, pat it into a 3-inch circle and place the stuffed jalapeño in the center of the sausage. Wrap the sausage around the stuffed jalapeño until it’s completely covered, and form into an egg shape.
Place meat-wrapped jalapeños on the sheet, about an inch apart. Bake for 15-20 minutes, or until the sausage is cooked. For additional browning on top, you can place the sheet under the broiler for 2-5 minutes. (I like mine as juicy as possible, so I skip this step).
Sprinkle your eggs with lots of fresh lime juice and serve with buttermilk dressing, queso or salsa. I like juicy lime wedges on the side too.
When making this with supermarket beef, I might use a broiler pan wtih a rack to elevate the eggs from the surface of the pan. Supermarket beef won't be dry-aged, so will release more water, and shrink more, and you may get better results lifing the meat so the liquid can drain away.
Armadillo eggs are not worth the making if you don’t also have good buttermilk dressing. Here’s my fave, also Homesick Texan inspired, though lacking the heat. I don’t miss it, tobasco or hot sauce can be added at table for those who like it, and those who don’t will appreciate the cool, flavorful dressing on pretty much everything.
- 1/2 cup prepared mayonnaise I like Hellman's or Duke's. Homemade is nice too, if you're okay with raw eggs
- 1/2 cup thickened Greek yogurt Chobani whole milk Greek style is my favorite
- 1/2 cup buttermilk Marburger's is my go-to, but a teaspoon of vinegar or lemon juice in whole milk will work too. Allow it to set at room temp to thicken first
- 1/4 cup chopped cilantro
- 1 clove garlic crushed
- Salt and Pepper to taste
Mix all the ingredients together and let chill for an hour before serving.
Makes one generous cup. Keeps in the fridge for a week, but good luck with that 😀
Armadillo Eggs are an unexpected recipe for a party dish that’s unique, accommodates most non-vegan diets, and stays on the Real Food spectrum, if you’re trying to kick the processed foods. I pretty much guarantee if you’re doing a potluck, you will please most, and copy none.
Beverage-wise, making all-beef Armadillo Eggs as I have here, a crisp, lighter white wine, or pilsner, or lime or lemonade would be my go-to. Mojitos or margaritas are always welcome, the key is light, bright, not too sweet. And, if you’re from Pittsburgh area and would like some Auburn Meadow Farm ground beef for yourself, find the details here.
by jackie | Aug 4, 2024 | Uncategorized
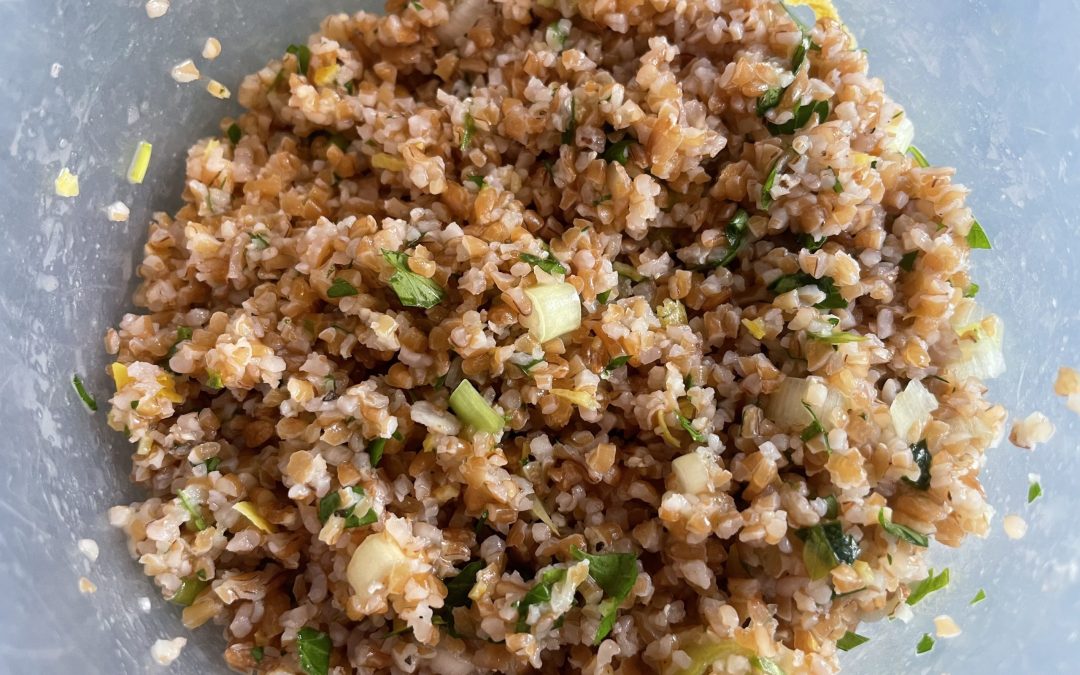
This is an easy summer staple around here – so flexible and delicious! It is so welcome to see ancient grain options returning to the mainstream as they are often more nutrient dense, offered by brands focused on fair treatment of farmers and employees, and protecting critical biodiversity. Bulgur is often less expensive and a good substiture for rice, and is more nutritious and gluten-stable, plus the cooking ease is hard to beat. Mayo-free salads like this are perfect for picnics and work lunches too.
- 1 cup bulgur Bob's Red Mill will be fresher and higher quality
- 1 cup boiling water
- 1 tsp kosher salt
- 4 scallions sliced on the bias
- 1/2 cup parsley leaves chopped
- 1/2 cup mint leaves chopped
- 1/3 cup golden raisins
- 1 cup pomegranate seeds
- 2 TBS fresh lemon juice
- 2 TBS extra virgin olive oil
- freshly ground black pepper
In a medium bowl, combine bulgur and salt. Top with boiling water, cover with a plate until absorbed, about 30 minutes.
Toss in remaining ingredients, season to taste with salt and pepper.

by jackie | May 26, 2024 | Uncategorized
This is Second Lieutenant Richard Vandegeer. I think of him often, and for sure every Memorial Day. Here is a link to an unforgettable recording of him and others describing the last days of pulling out of Saigon, piloting the helicopters filled with desparate people.
There is so much about this program that has become lodged in my heart; Second Lieutenant Vandegeer’s eloquence, sheer exhaustion, and drain of emotion is really gripping and unforgettable.
When the recording was made, he was 28. He had no idea, or perhaps he had every idea, his days were numbered. Lt. Vandegeer’s helicopter was shot down in 1975, and he never returned to his Ohio home. His remains were not recovered until twenty years later.
I honestly do not get the romance for war. Listen to this soul-weary young soldier. All his talents, dreams, courage, and labor made it possible for so many other soldiers to return home. But the numbness in his voice tells the hard truth that some part of every single soldier who made it home died on the battlefields with their fallen brothers and sisters.
Enjoy your BBQ, your beers, your day off, and this fine summery holiday. But also? Be sure to take the time to deeply ponder all those soldiers who never made it home. And those who will never be the same.
Being citizen of a country aspiring to greatness is not a right to take for granted, but a call to service and active citizenship. Our best thanks to our fallen soldiers is for us to tend and mend the ideals they died for, and to strive our hardest to be Americans worth fighting for.
A heartfelt thank you for your service, Veterans, and deep space for the memories this day brings you.